안녕하세요 이번에는 안드로이드의 접근 권한에 대해 알아보겠습니다.
안드로이드의 접근 권한의 종류는 매우 많습니다. 그중에서 사용자에게 요청을 해야 하는 권한, 요청을 하지 않아도 되는 권한이 나누어지게 됩니다.
연락처, 파일, 위치 등의 권한은 사용자에게 요청을 해야하고 인터넷, 생체인증 등의 권한은 요청을 하지 않아도 사용이 가능합니다.
이번에는 권한의 종류와 사용자에게 요청하지 않아도 되는 권한 중 하나인 생체 인증의 예제를 만들어 보고 다음에는 사용자에게 요청해야 하는 권한들을 이용한 예제를 만들어 보겠습니다. 그러면 먼저 접근 권한의 종류에 대해 알아보겠습니다.
Android Permission 종류
// 사용자에게 요청하지 않아도 되는 권한 (Normal Permission)
"android.permission.INTERNET"				// 인터넷 사용 권한
"android.permission.BLUETOOTH"				// 블루투스 상태 확인 권한
"android.permission.VIBRATE"				// 진동 사용 권한
"android.permission.ACCESS_WIFI_STATE"		// WIFI 상태 확인 권한
"android.permission.SET_ALARM"				// 알람 권한
"android.permission.USE_BIOMETRIC"			// 생체 인증 권한
"android.permission.FOREGROUND_SERVICE"		// 포그라운드 서비스 사용 권한

// 사용자에게 요청해야 하는 권한 (Dangerous Permission)
"android.permission.READ_CONTACTS"			// 연락처 읽기 권한
"android.permission.WRITE_CONTACTS"			// 연락처 쓰기 권한
"android.permission.READ_EXTERNAL_STORAGE"	// 외부저장소 읽기 권한
"android.permission.WRITE_EXTERNAL_STORAGE"	// 외부저장소 쓰기 권한
"android.permission.READ_CALENDAR"			// 캘린더 읽기 권한
"android.permission.WRITE_CALENDAR"			// 캘린더 쓰기 권한
"android.permission.CAMERA"					// 카메라 사용 권한
"android.permission.ACCESS_COARSE_LOCATION"	// 네트워크 위치 권한
"android.permission.ACCESS_FINE_LOCATION"	// 네트워크+GPS 위치 권한
"android.permission.RECORD_AUDIO"			// 녹음 권한
이 외에도 여러 종류의 권한들이 있습니다.
그럼 이번에는 NormalPermission의 사용법을 알아보면서 생체 인증의 예제를 만들어 보겠습니다.
NormalPermission 예제 (생체 인증)
- AndroidManifest.xml
<manifest xmlns:android="http://schemas.android.com/apk/res/android"
    xmlns:tools="http://schemas.android.com/tools"
    package="com.example.fingerprintex">

	<!-- 생체 인증 사용 권한 -->
    <uses-permission android:name="android.permission.USE_BIOMETRIC" />

    <application
		...
    </application>
</manifest>
Normal Permission은 위와 같이 permission 권한을 선언만 해주면 간단하게 사용이 가능합니다.
- build.gradle(Module: app)
dependencies {

	...

    // biometrics
    implementation 'androidx.biometric:biometric:1.1.0'
}
생체 인증을 사용하기 위해 androix biometric을 의존성 추가해줍니다.
- activity_main.xml
<androidx.constraintlayout.widget.ConstraintLayout xmlns:android="http://schemas.android.com/apk/res/android"
    xmlns:app="http://schemas.android.com/apk/res-auto"
    xmlns:tools="http://schemas.android.com/tools"
    android:layout_width="match_parent"
    android:layout_height="match_parent"
    tools:context=".MainActivity">

    <TextView
        android:id="@+id/txtBio"
        android:layout_width="wrap_content"
        android:layout_height="wrap_content"
        android:text="생체 인증을 완료해 주세요."
        app:layout_constraintBottom_toBottomOf="parent"
        app:layout_constraintEnd_toEndOf="parent"
        app:layout_constraintStart_toStartOf="parent"
        app:layout_constraintTop_toTopOf="parent" />

    <Button
        android:id="@+id/btnBio"
        android:layout_width="wrap_content"
        android:layout_height="wrap_content"
        android:text="지문 인증"
        app:layout_constraintBottom_toTopOf="@id/txtBio"
        app:layout_constraintEnd_toEndOf="parent"
        app:layout_constraintStart_toStartOf="parent" />

</androidx.constraintlayout.widget.ConstraintLayout>
다음은 레이아웃입니다. 간단하게 생체 인증 결과를 나타낼 TextView와 생체 인증을 진행할 Button을 만들어 주었습니다.
- MainActivity.kt
이제 생체 인증을 사용해보겠습니다.
override fun onCreate(savedInstanceState: Bundle?) {
    super.onCreate(savedInstanceState)
    setContentView(binding.root)

    binding.btnBio.isEnabled = getBioAvailable()
    binding.btnBio.setOnClickListener {
        setBiometricPrompt().authenticate(getPromptInfo())
    }
}

private fun setBiometricPrompt() = BiometricPrompt(this, object : BiometricPrompt.AuthenticationCallback() {
    override fun onAuthenticationSucceeded(result: BiometricPrompt.AuthenticationResult) {
        super.onAuthenticationSucceeded(result)
        binding.txtBio.text = "인증 성공!"
    }

    override fun onAuthenticationError(errorCode: Int, errString: CharSequence) {
        super.onAuthenticationError(errorCode, errString)
        binding.txtBio.text = errString
    }

    override fun onAuthenticationFailed() {
        super.onAuthenticationFailed()
        binding.txtBio.text = "인증 실패!"
    }
})

private fun getPromptInfo() = BiometricPrompt.PromptInfo.Builder().apply {
    setTitle("생체정보를 인증해주세요.")
    setNegativeButtonText("취소")
}.build()

private fun getBioAvailable() : Boolean {
    BiometricManager.from(this).also {
        return when(it.canAuthenticate(BIOMETRIC_WEAK)) {
            BiometricManager.BIOMETRIC_SUCCESS -> {
               true
            }
            else -> {
                false
            }
        }
    }
}
먼저 onCreate 부분에서 getBioAvailable() 메서드를 실행하여 사용자의 기기가 생체 인증이 가능한지 확인하여 사용이 가능하다면 true를 반환하여 btnBio버튼을 Enable 하여주고, 불가능하다면 false를 반환하여 btnBio버튼을 Diable 해줍니다.
다음은 btnBio버튼을 클릭하였을 때 setBiometricPrompt().authenticate(getPromptInfo())를 통해 생체 인증을 진행하게 됩니다.
setBiometricPrompt() 메서드는생체 인증 Prompt를 생성하고 생체 인증 Callback을 등록하여 줍니다. 생체 인증이 성공하게 된다면 txtBio의 text를 '인증 성공!'으로 나타내 주고, 생체 인증에 실패하게 된다면 '인증 실패!'로 나타내 줍니다. 이 외의 Error가 발생한다면 반환된 errString을 TextView에 표시해줍니다.
다음으로 authenticate를 통해 생체 인증을 진행하게 되고 이 때 getPromptInfo() 메서드를 통해 받아온 PromptInfo를 등록해줍니다.
getPromptInfo()는 생체 인증을 진행하며 사용자에게 나타낼 정보를 설정하는 메서드입니다. 여기서는 Title과 NegativaButton의 text를 지정해주었지만 이외에도 setSubTitle, setDescription 등의 설정이 가능합니다.
그러면 이제 결과를 보도록 하겠습니다! 생체 인증 화면은 검은색 화면으로 나타나게 되어서 제대로 보여드릴 수가 없습니다.
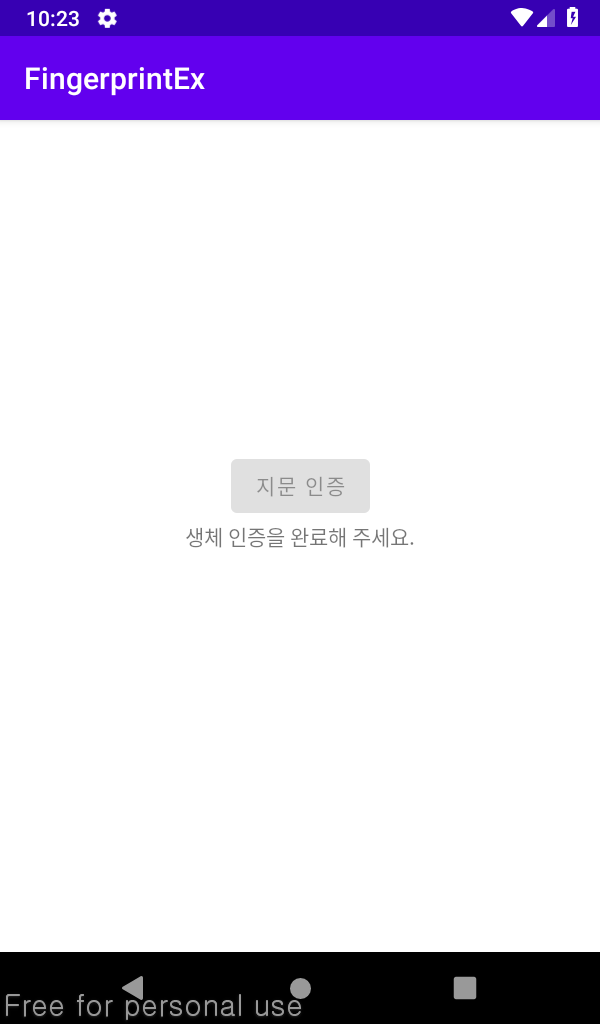
생체인증이 가능한 휴대폰에서는 버튼이 활성화되고 생체인증이 불가능한 휴대폰에서는 버튼이 비활성화가 되었습니다.
왼쪽 사진의 경우 순서대로 지문 인증, 취소 버튼, 백 버튼으로 취소한 상태입니다.
예제는 아래의 Github에서 보실수 있습니다!!
GitHub - won-droid/function
Contribute to won-droid/function development by creating an account on GitHub.
github.com
이번에는 안드로이드의 Permission종류와 간단하게 생체인증을 해보았습니다. 다음에는 Dangerous Permission으로 예제를 만들어 보도록 하겠습니다. 문제가 있거나 이해가 되지 않는 부분이 있으시면 댓글을 남겨주시면 답변드리겠습니다!
'Android > Libraries' 카테고리의 다른 글
| [Android] 안드로이드 Permission(권한) 예제 - 연락처/주소록 만들기 (권한 획득, 연락처 불러오기) (0) | 2022.07.24 |
|---|---|
| [Android] Parcelable 생성 Parcelize로 편하게 생성하기(with Serializable) (0) | 2022.07.24 |
| [Android] 안드로이드12 대응 SplashScreen(스플래시 스크린) 만들기 (1) | 2022.07.09 |
| [Android] Glide를 사용하여 ImageView에 사진 불러오기 (0) | 2022.07.03 |
| [Android] Kakao(카카오) SDK를 이용하여 로그인 구현하기 - 로그인 (0) | 2022.05.27 |